
Hey, I re-sent it at 4:09pm about two days ago, just FYI. No rush on my end but just wanted to confirm. The attachment was a zip file this time instead of SVGs in case that makes any difference to your email filters.
A member registered Jan 17, 2020
Recent community posts
For anyone else using the SM 2.0 with the 200 watt CNC and bracing kit: I was able to get great results while going much faster by using 1/4 inch bits rather than the included 1/8th inch (had to order a 1/4 inch ER11 collet from Amazon). With 0.5mm and 1/32" diameter tapered ball ends, I was able to get up to about 68 in/min (single-pass, full 1/8" depth, roughing pass unnecessary) before the quality dropped off on some bamboo cutting boards. Time was maybe 1.5 hours.
Also, Charlie, I emailed you a bug report with some SVG attachments but hadn't heard back yet so I am concerned it may have gone to your spam folder. Please let me know if you didn't get it. Thanks!
PixelCNC Has Moved: deftware.org community · Created a new topic Paths cutting too much where there are grooves in a relief?
Not sure if this is a bug or expected behavior but where sharp corners meet, I get cut paths during roughing that remove too much material:
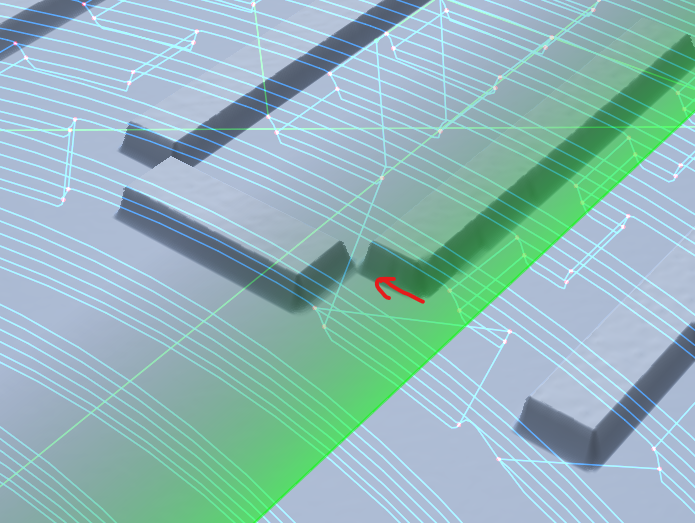
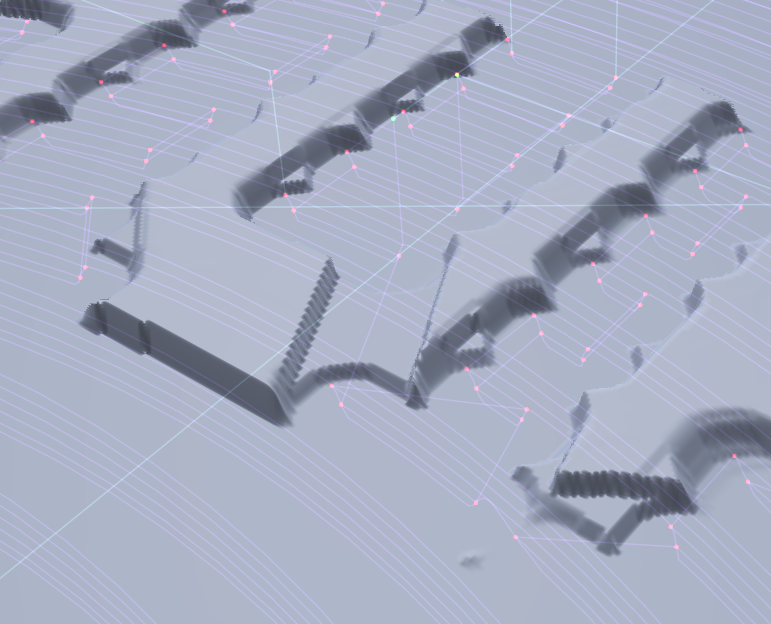
It seems like it makes a decision to place the cut path based on average height within the tool's diameter rather than max height. If so, perhaps that could be configurable? So far I've been able to work around it by adjusting stepover and other things but thought I'd mention it.
Thanks!
Hi Charlie,
Wow. Looks good! Yeah I think that would help a lot. It would save a lot of trouble compared to fiddling with PBR textures when you can just adjust some parameters until it looks right. Nice work!
To answer your earlier question, I've been mostly interested in hardwoods lately: cherry, walnut, bamboo, oak, and the like. I'm still very new at this though so I'm not sure what defaults would be more generally useful.
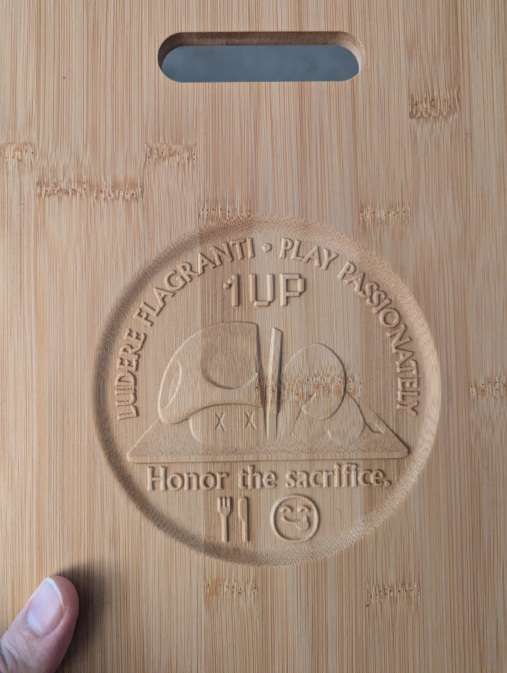
Just for fun, here is a draft of a relief I'm working on in Blender for my video game-loving siblings and myself. The plan is to put it on a display-only side of a cutting board.

Chris